
![7 Ecommerce Photo Editing Tips: Boost Sales 40% [Updated 2026]](https://thekowcompany.com/images/thumbnail/7-advanced-photo-editing-techniques-for-e-commerce-product-images.webp)
Product photos are crucial for your online sales. In fact, 75% of online shoppers depend on product images to decide what to buy. This guide shows 7 advanced photo editing techniques that helped top e-commerce brands boost their conversion rates by 40%. If you want to improve your product images for Shopify, Amazon, or your own store, use these effective strategies. Techniques like AI background removal and professional color grading can enhance your photos and help increase your sales. Best part? Most techniques take less than 5 minutes per image.
When people shop online, they don't get the chance to touch the fabric, test the quality, or see the product in person. All they have are photos, and those pictures have to do the heavy lifting. A quick brightness fix or crop won't cut it anymore; shoppers want images that feel real. Take a simple chair as an example. On a plain white background, it looks fine, maybe a bit flat. Place that same chair in a cozy room with soft shadows, though, and suddenly it feels like something you'd want in your home.
That's the difference advanced photo editing makes small tweaks like adding natural reflections, cleaning up dust, correcting colors so they match the real item, or stacking images for sharper detail might seem minor, but they add up fast. Show the same product in different colors without new photoshoots, or let buyers spin it around in 360°, and you've got something far more convincing. Done right, these edits don't just make products look nice; they build trust, cut down returns, and, in many cases, boost sales by a noticeable margin.
Here we'll discuss the 7 advanced photo editing methods that not only influence customers, but they also convince them.
7 Advanced Photo Editing Techniques That Boost E-commerce Sales
Professional product photography is now not only an extra add-on, but it's mandatory for all E-commerce brands. We are just pointing out 7 unavoidable and influential methods for a company's product visualization.

1. AI-Powered Background Removal & Smart Replacement: Save 90% Editing Time
When you look at a product photo, the last thing you want is a background that’s busy or distracting. Customers naturally focus more when the item is clear and front and center. In the past, cleaning up those backgrounds took hours of detailed work, especially for products with tricky edges like jewelry, clothes, or glass. Now, AI-powered background removal tools like Retouched.ai can handle it in seconds, often with results that look cleaner than manual editing.
What really makes this useful, though, is not just cutting things out; it’s what you can put in. A plain white or studio-style background might be perfect for a website, but a lifestyle setup, like a living room, a café table, or even a city street, can make the same item feel alive on social media. Understanding the importance of background removal for e-commerce helps you realize how this flexibility keeps your images consistent, helps people picture the product in their own lives, and makes the overall shopping experience more convincing without extra effort.
Top AI Background Removal Tools
- Retouched.ai – Best for E-commerce Product Photography
- Adobe Firefly – Best for Professional Designers
- Remove.bg – Best for High-Volume Processing
- Canva – Best for Beginners & Social Media
- Clipping Magic – Manual Control + AI Speed
The right tool depends on your specific needs and workflow. For a detailed comparison of features, pricing, and use cases, check out our in-depth guide: 5 Best AI Background Removal Tools
2. Professional Color Grading & Brand Consistency: Build Instant Recognition
Getting color right in product photos isn't just about how they look; it's about trust. You've probably felt it: order a red dress online, and what arrives is closer to wine or orange. It feels wrong. Most shoppers won't ignore it; they'll return it, leave a bad review, or quietly stop trusting the brand. Sometimes they posted that on social media, which can directly create a bad impression for that company.
Color grading helps avoid that. It keeps photos true to the real shade and makes a catalog feel consistent instead of messy. If someone scrolls through page after page or puts two products side by side, the colors should line up. If they don't, it just feels off.
It also connects with branding. A sustainable fashion label might lean on warmer, earthy tones. A tech brand might go for cooler, sleeker shades. When that palette stays steady across all images, people start to recognize the brand instantly. And recognition matters, it gives buyers confidence that what they saw on the screen will actually match what shows up at their door. This is where professional image retouching plays a crucial role in maintaining that consistency.
Essential Color Grading Methods:
- Create custom LUTs (Look-Up Tables) for one-click consistency across all products
- Use HSL adjustments to target and correct specific product colors
- Maintain consistent white balance (avoid warm/cool shifts between images)
- Apply brand color overlays for a cohesive gallery appearance
- Test final colors on multiple devices before publishing
Color Psychology for E-commerce:
- Blue: Builds trust (tech, finance, healthcare products)
- Red: Creates urgency (sales, clearance, limited offers)
- Green: Suggests eco-friendly and natural products
- Black/Gold: Conveys luxury and premium quality
3. Dynamic Lighting Enhancement & Shadow Creation: Make Products Look Premium

Lighting can directly make or break the imagination of how a product visually looks. Too dark, and the details vanish. Too bright, and the colors get blown out. Either way, the product doesn't look right. Dynamic lighting enhancement fixes that by balancing the exposure so the image feels natural and closer to what you'd see in real life.
But brightness alone isn't enough. Shadows and reflections change everything. A shoe with a soft shadow underneath feels solid, like it's actually sitting on a surface. A watch with a faint reflection across the glass looks more premium. Without those touches, the photo feels flat. With the proper lighting and shadow on products, it feels alive.
When images capture that kind of depth, shoppers trust them more. The product looks believable, not like a cutout on a screen. And once it feels real, it's easier for customers to picture themselves owning it, which often makes clicking "Buy Now" a lot more natural.
Key Lighting Fixes:
- Recover underexposed photos using curves and levels adjustments
- Add fill light to eliminate harsh shadows without losing dimension
- To add depth, create natural drop shadows with an opacity of 15-20%
- Use gradient lighting for 3D product appearance
- Balance highlights without losing fine detail or texture
Shadow Creation Best Practices:
- Soft shadows: Lifestyle products (blur 20-30px, 15-20% opacity)
- Hard shadows: Technical products (blur 5-10px, 20-25% opacity)
- Always match the shadow direction to your light source
- Use the multiply blend mode for natural-looking shadows
- Use dark gray instead of pure black for shadows to make them look more realistic
4. Mobile-First Image Optimization: Capture 70% of Your Traffic
Most shoppers today aren't sitting at a desk; they're on their phones. More than 77% of e-commerce sales are generated by mobile users. Which means product photos need to be designed for small screens first. A big image that looks great on a laptop might load too slowly on mobile or crop in a way that cuts off the main detail. If that happens, people just swipe past. Mobile-first editing fixes this by making photos light and clear.

Compression trims the file size so the page loads fast, even on weak networks. Cropping is adjusted so the key part of the product, like the logo on a sneaker or the shine on jewelry, always stays in view. Aspect ratios are tweaked, too, so images don't stretch or look odd when switching between portrait and landscape. The best is to use square-shaped images, which can fit all devices and platforms.
On mobile, buyers aren't reading long product descriptions. They're scrolling quickly, and photos do the heavy lifting. When images are sharp, framed right, and load instantly, the product feels easier to trust. And that trust is often what turns a quick scroll into a sale.
Mobile Optimization Checklist:
- Resize images to a width of 1200-1500 pixels. This size works well for both mobile and desktop devices
- Compress to 100-200KB per image without visible quality loss
- Use WebP format (30% smaller than JPEG with the same quality)
- Use lazy loading to make the page load faster at the beginning
- Test on 3G connections to ensure the load time is under 3 seconds
Technical Specifications:
- Format priority: WebP > JPEG > PNG
- Resolution: 72 DPI for web (300 DPI only for print)
- Aspect ratio: 1:1 (square) or 4:5 (portrait) for social media
- File size: Keep the size under 200KB for quick loading on mobile devices
- Dimensions: Minimum 1500x1500px for zoom functionality
5. Advanced Composite Photography: Create Perfect Shots Without Reshoots
Sometimes one photo just doesn't cut it. Maybe the lighting looks good in one shot, but the fabric detail shows better in another. Instead of picking the "least bad" option, composite editing lets you blend the best parts into a single image that feels much closer to perfect.
It's a go-to technique in industries where little details make a big difference. Fashion brands use it to merge a strong pose with the sharpest texture. Jewelers rely on it to show sparkle without blurring the edges. Even real estate agents use composites to brighten interiors or fix shadows so a space looks more inviting online.
What makes it powerful is that shoppers never notice the work behind it. They don't see 3 or 4 images stitched together; they just see a photo that feels clean, polished, and real. That seamless look builds trust, and trust is often the difference between someone scrolling past and someone clicking "Purchase".
When to Use Composite Photography:
- Impossible angles or perspectives that can't be captured in one shot
- Get the right lighting on the whole product by combining different exposures
- Using multiple focus points helps achieve sharpness from edge to edge. This technique is known as focus stacking
- Adding reflections or environmental elements post-shoot
- Creating "hero" images for homepage banners or advertising
Popular Composite Techniques:
- Focus stacking: Take 5 to 10 photos to ensure your jewelry or watches are completely sharp and clear
- Exposure blending: Merge multiple exposures for perfect lighting balance
- Background swapping: Keep perfect product lighting while changing context
- Reflection compositing: Add realistic surface reflections digitally
- Scale compositing: Show products in context (furniture in rooms, watches on wrists)
6. Texture & Material Enhancement: Show True Product Quality
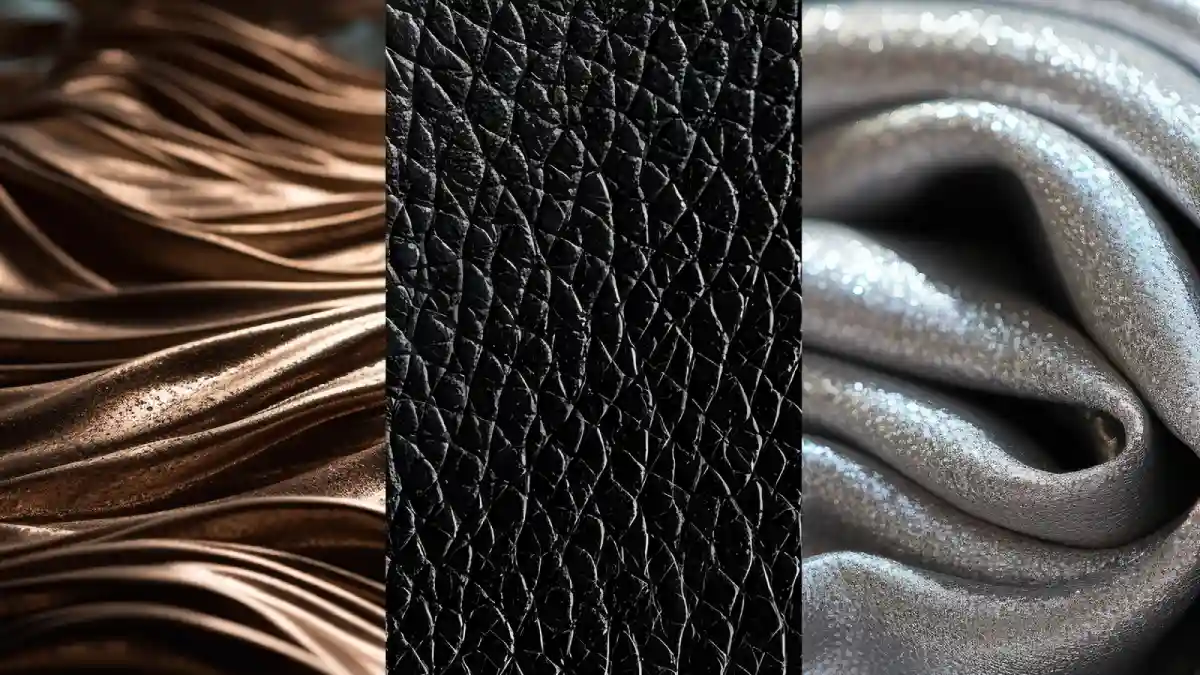
One of the hardest things about shopping online is not being able to feel the product. You can't tell if a fabric is soft or if leather has that natural grain. Photos have to do the job of showing those qualities. That's where advanced editing comes in. It can pull out the weave in a cotton shirt, the shine in a metal surface, or the fine texture in a leather bag, details that would otherwise get lost in a flat image.
It's not just clothing. Jewelry editing often brings out the sparkle in stones without making them look fake. Car photos get the same treatment too, reflections on the body, sharp edges in the interior, all enhanced so the product feels more real. For products needing intricate detail work, understanding texture modeling in realistic 3D products can take your visuals to the next level. When textures show clearly, shoppers can picture the item in their hands. That little bit of realism cuts hesitation and makes them more comfortable hitting to buy.
Methods are designed to improve performance by focusing on the unique traits of each material.
Fabric/Clothing:
- Enhance the look of weave patterns by using a high-pass filter
- Reduce wrinkles while maintaining the natural flow of the fabric
- Increase the shine of fabric by making small changes to the highlights
- Maintain 100% color accuracy (critical for reducing returns)
Metal/Jewelry:
- Enhance reflections and shine without overexposure
- Remove fingerprints, dust, and surface imperfections
- Sharpen engravings and fine details
- Balance highlights to prevent blown-out white areas
Glass/Transparent Materials:
- Remove smudges and clean up reflections using digital tools
- Add soft edge lighting to create more definition and depth
- Be clear and open when sharing internal details
- Clear away distracting backgrounds seen through glass
Leather/Wood:
- Enhance natural grain and texture patterns
- Just add some light shadows in the cracks to give it more depth.
- Keep natural color variations to avoid a flat look
- Sharpen fine details without creating artificial look
7. Interactive Element Integration: Increase Engagement by 300%
Shopping online is changing day by day. A flat picture isn't enough anymore. People want to turn a product around, zoom in, and look at it from different sides. That's why 3D views and 360° spins are becoming popular; they make it feel more like you're in a store, checking things for yourself.
Picture this: you're looking at a chair. You spin it to see the back. Or maybe it's a watch you tilt online and catch the way light bounces off the glass. That little interaction makes the product feel more real, not just another image on a screen.
And here's the real benefit: shoppers trust what they can explore. They stay longer on the page, they hesitate less, and they're less likely to send the item back. In the end, that means more confidence for buyers and more sales for the brand. If you're thinking about adding this capability, explore our 3D modeling and rendering services to discover how interactive visuals can elevate your product presentations.
Use engaging tools and dynamic features to boost customer interaction and increase conversions. Here are few of them:
360° Product Views:
- Take 24 to 36 images as you turn the product on a turntable
- Use software like Sirv, CloudImage, or Spinzam to create interactive viewer
- Increases customer engagement by 250%
- Cuts product returns by 35% because customers clearly understand what they are buying
Zoom Functionality:
- Make sure you can zoom in about 3x to 5x for a closer look
- Use images that are at least 3000x3000 pixels in high resolution
- Show the texture, stitching, material quality, and small details
Augmented Reality (AR):
- Create images that have transparent backgrounds and save them in PNG format
- Make sure to get the product dimensions and scale right
- Test AR placement in real-world environments before launch
- Customers feel 94% more confident in their purchases because they can visualize the product in their space
Video Integration:
- Include 15-30 second videos of the product showing all angles
- Show the features, size, and real-world use
- Embed the image gallery directly for a smooth experience
- Products that include video see 80% more sales than those that don't
Industry-Specific Advanced Techniques
Different industries need different types of photo editing approaches. Whether it's fashion, electronics, or home decor, tailoring techniques to your niche ensures your product images are optimized for impact and conversion as you need.
Fashion Photography Editing
Clothing is tricky to capture in photos. The fabric has to look natural, the model's skin should be retouched without losing texture, and the lighting needs to stay consistent across all shots. Editing helps keep everything balanced so the clothes look sharp, smooth, and ready to wear.
Essential Fashion Editing Methods:
- Use the ghost mannequin effect to highlight the shape and fit of garments without distractions from a model
- Color correction to match exact fabric shades (prevents color-related returns)
- Wrinkle removal while maintaining natural fabric texture and flow
- Consistent lighting across the entire catalog for a cohesive brand appearance
- To show size and fit, use flat-lay images, photos of models wearing the items, and close-up detail shots
- Fabric texture enhancement to show weave, knit patterns, and material quality
Jewelry Photo Retouching

Jewelry sells on product details. A tiny flaw or dull reflection can ruin the whole effect. Editing brings out the sparkle in stones, cleans up reflections, and makes the fine textures stand out. When done right, it highlights the quality and luxury without looking fake or overly polished, which can really impress potential buyers.
Essential Jewelry Editing Methods:
- Combine 8 to 12 images to achieve sharpness from edge to edge using focus stacking
- Reflection and shine enhancement without overexposure or blown highlights
- Remove dust, fingerprints, and scratches for a perfect presentation
- Metal colors can look similar but are different. For example, white gold looks different from silver, and rose gold has a different tone than copper
- Stone clarity and sparkle enhancement (especially for diamonds and gemstones)
- Consistent white or black backgrounds for the luxury marketplace standards
Real Estate Photo Editing
When it comes to real estate, having inviting photos is key! Using HDR techniques can brighten up those darker corners and keep highlights in check, making rooms feel spacious and warm. Swapping out a dull sky for something brighter can really make an exterior shine, too! Plus, finding that perfect balance of indoor light helps potential buyers envision the space as cozy and welcoming, rather than flat or shadowy. It's all about creating an inviting atmosphere!
Essential Real Estate Editing Techniques:
- HDR blending to balance bright windows with darker interior spaces
- Sky replacement is a terrific way to turn dull or gloomy outside shots into colorful, lively scenes
- Fix lens distortion and straighten vertical lines with perspective correction.
- Virtual staging to furnish empty rooms and help buyers visualize potential
- Use color grading to create a warm, inviting atmosphere. Avoid using cold and sterile tones
- Clutter and object removal to declutter spaces without losing authenticity
Car Image Editing
Cars need to shine literally. Editing highlights the gloss of the paint, sharpens reflections, and clears away distractions in the background. The result is a car that looks showroom-ready, even on a small screen, which makes it easier for buyers to picture owning it.
Essential Automotive Editing Techniques:
- Paint enhancement to bring out gloss, depth, and color vibrancy
- Getting that showroom shine means paying attention to reflections on your windows and body panels
- Background removal or replacement to eliminate distracting parking lots or surroundings
- Clean and shine your wheels and tires by removing brake dust and making your tires look darker
- The interior lights are set up to make the dashboard, seats, and features easy to see
- Remove scratches, dents, and dust for a flawless presentation
Electronics Product Editing
Tech products need precision. When editing, focus on removing glare, controlling reflections on screens, and sharpening images to highlight design and functionality. Use clean backgrounds and light shadows to make devices stand out while keeping a professional look. Learn about the latest product visualization trends in tech accessories to stay ahead of the competition.
Essential Tech Product Editing Techniques:
- Swap out the screen for some awesome UI screenshots or cool branded content
- Dealing with glare and reflections on shiny surfaces like phones, tablets, and monitors
- Clean dust, fingerprints, and smudges for a clear look
- Sharpening the edges really makes the excellent design and solid engineering stand out
- Multiple-angle views showing ports, buttons, and key features
- Clean white or gradient backgrounds for a modern, professional look
Before & After Showcase
One of the simplest ways to prove the value of editing is to just show it. A before-and-after gallery makes the difference clear without extra explanation. Think of a plain studio shot turned into a lifestyle image that feels aspirational, like a jewelry photo where the stones go from looking kind of dull to shining with all their details. Even a fashion shot can shift completely once lighting and texture are enhanced; it suddenly looks ready for a campaign.
These side-by-side examples do more than impress. They give shoppers proof that editing adds value and shows brands as detail-oriented and trustworthy. For service providers, a gallery works like a portfolio; it demonstrates results, builds credibility, and makes it easier for clients to picture what's possible for their own products. See our 2D service portfolio to notice the transformation quality editing can achieve.
Conclusion
Advanced e-commerce product photo editing goes beyond basic touch-ups. It includes techniques like removing backgrounds with AI, improving lighting, creating composite images, and making interactive visuals. These methods help your products stand out in a crowded online market.
By using professional photo enhancement services, you can increase sales, build trust, and maintain a consistent brand identity across many product images. If you want to grow your online store and your new one, it's better to learn what photo editing really means for your business. Adding these advanced editing techniques to your process is essential for your e-commerce brand.
Frequently Asked Questions
How to edit photos for e-commerce?
After the photoshoot, select which images will be used for your brand. Then you have to do a few tasks like background removal, color correction, retouching, and add a realistic shadow for a better view of a product. It's better to keep the image size (under 200KB) short for fast loading.
What's the difference between basic e-commerce photo editing and these advanced techniques?
Between the basic and advanced level editing of an image, you can notice huge differences. Because in basic photo editing, you need to do just background removal, cropping to the size you need, and simple color adjustment for an overall view. But in advanced photo editing, you need to remove unwanted objects from the photo, professional color grading for your brand consistency, realistic shadows, and multi-device optimization.
How do advanced photo editing techniques actually boost e-commerce sales by 40%?
Professional images increase trust 86% of consumers say image quality influences purchase decisions. Optimized images reduce bounce rates by 30%, accurate colors cut returns by 15-25%, and lifestyle composites boost emotional connection. Enhanced mobile optimization captures 70%+ of mobile shoppers. These improvements create a better engagement + higher trust + lower returns = 20-47% conversion rate improvements.
How do I integrate these advanced techniques into my existing photo editing workflow?
If you add or integrate advanced techniques of photo editing in your current workflow, you can save 30-40% time, and you can get more time to create a better plan for product launching. At first, you need to use AI-powered background removal tools like Retouched.ai so that you can get enough time for other tasks. Then create brand-specific presets for consistent color grading. Add batch processing for repetitive tasks. The most important thing is that if you have an in-house team, then train your team first, or if you outsourced to any photo editing company, then clearly communicate your brand standards and editing expectations to ensure consistency and quality.
How do professional color grading techniques ensure brand consistency across thousands of product images?
Professional color grading uses custom LUTs and preset profiles that encode your brand's exact color values and tonal curves. These presets apply automatically to every image through batch processing. Color calibration tools like X-Rite Color Checker maintain accuracy across different cameras.
Can AI-powered background removal replace manual advanced composite photography techniques?
Actually, nobody knows what’s gonna happen in the future, but some things are clear. AI tools are getting faster and smarter; they can handle hundreds of images in minutes with solid accuracy. But when it comes to complex edits like transparent glass, fine textures, or creative composites, human touch still wins. For now, AI is great for speed, and manual techniques are best for precision. Using both together gives the most efficient and professional results
How do I measure the effectiveness of professional photo enhancement on my conversion rates?
Run A/B tests updating 50% of images while tracking: conversion rate (+15-30% target), bounce rate (-20-30%), time on page (+40-60%), and return rates (-15-20%). Use Google Analytics 4 for engagement, Hotjar or Microsoft Clarity for user interaction, and your platform's analytics for sales data. Calculate ROI: if $500 in editing generates $3,000 in additional sales, that's 500% ROI. Most brands see results within 2-4 weeks.
Should I hire professional retouching services provider for my business?
Hire professionals if you have 100+ products, lack advanced in-house skills, need fast turnaround, or sell high-value items where image quality drives sales. Contact us to discuss your project or book a call with our team to get started today. Contact us to discuss your project or book a call with our team to get started as early as possible.
What file formats and sizes should I use for e-commerce product images?
Use JPEG for most product images (smaller file size, fast loading) and PNG for images requiring transparency (like products with no background). For the best zoom functionality, aim for a size of 1500-2000px on the longest side. Keep the file size under 200KB by using tools like TinyPNG or Photoshop's 'Save for Web' feature.
How long does professional photo editing take per image?
Basic editing, like background removal and color correction, can take 5-15 minutes per image. Advanced techniques like composites, retouching, and shadows can take 20-45 minutes. Most professional services wrap things up in about 24 to 72 hours. If you've got a last-minute project, there are rush options available to speed things up.