
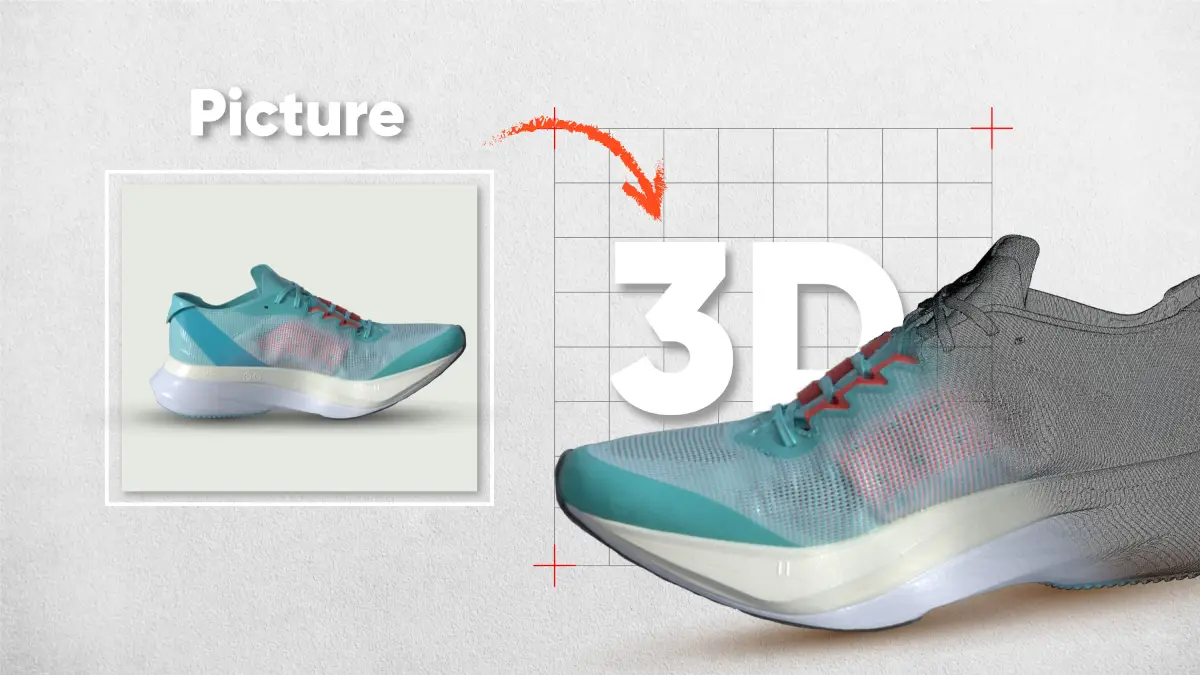
3D modeling from a photograph is a revolutionary process in the field of digital design. Whether you are a product designer, enthusiast, game artist, or entrepreneur, turning 2D images into 3D objects paves the way for innovation, customization, and holistic visualization.
In this definitive guide, we'll take you through the entire process, from learning the basics to selecting the right tools and overcoming technological limitations, so you can successfully bring your still images into a living, breathing 3D world.
What Is 3D Modeling and How Does it Work with Pictures?
3D modeling is a computer graphics process used to create a 3D object within a virtual world. It is the process of building a mesh or structure that defines an object's shape, volume, and surface properties. The mesh can be made to be textured, shaded, or animated for various uses, including animation, simulation, rendering, and manufacturing.
From 2D to 3D: The Role of Pictures
When dealing with 2D images, the issue is to reconstruct depth a dimension plane pictures lack. To overcome this issue, certain technologies and methods are employed to reconstruct 3D geometry from accessible data, such as illumination, texture, and perspective.
Major Technologies Utilized:
- Photogrammetry: Leverages numerous overlapping images from multiple viewpoints in an effort to rebuild the object's shape.
- AI-Based Depth Estimation: Use learned deep models from large datasets to estimate depth from a single image.
- Neural Radiance Fields (NeRF): This is one of the most advanced AI methods that simulates how light reflects off objects in a scene to generate high-quality 3D reconstructions.
These tools, employed alone or in combination, help different use cases and skill levels. Some are optimized for professionals who require photorealistic detail, while others are suitable for hobbyists who need a rapid turnaround.
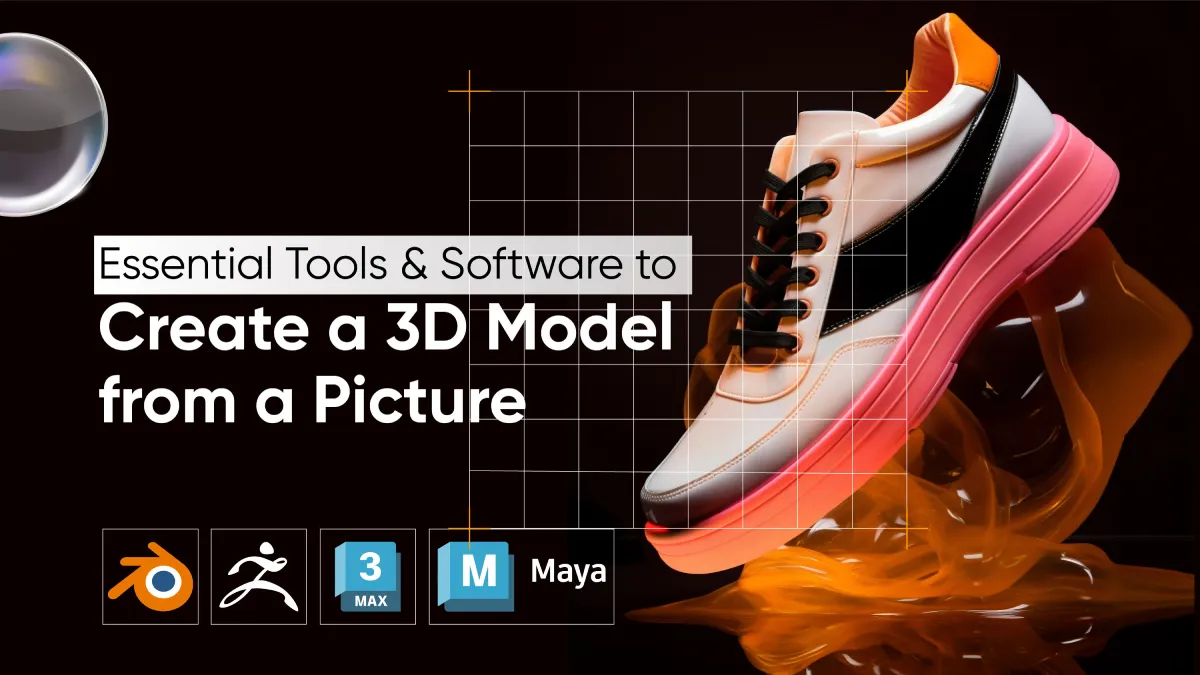
Essential Tools and Software to Create a 3D Model from a Picture
Your software selection will have a big influence on workflow and outcome. Below is an organized list of tools for each stage of the workflow:
1. Photogrammetry Software
It is ideal when you have several shots of the object from various viewpoints.
- Meshroom (Free & Open Source): Easy-to-use software that performs photogrammetry on your behalf using the AliceVision engine. And this is ideal for hobbyists people.
- Agisoft Metashape: High-end commercial software with more levels of control and high-accuracy outputs.
- RealityCapture: It's a very well-rated tool for precision and speed, also acceptable for commercial use in surveying and VR.
2. AI-Based Platforms
It is optimal for individuals with poor imagery or those who require instant results with minimal input.
- Holosnap: Holosnap is an innovative software that effortlessly transforms ordinary images into detailed 3D models. Using advanced AI and computer vision, Holosnap extracts depth and spatial data from photos, enabling users to create lifelike 3D representations without requiring complex modeling skills. Ideal for designers, architects, game developers, and 3D enthusiasts, Holosnap streamlines the process of turning 2D visuals into immersive, interactive 3D models.
- Luma AI: Smartphone app using NeRF to render video into 3D scenes of extraordinary realism.
- D-ID 3D Reconstruction: Used primarily to create realistic human avatars from one picture.
- Kaedim: Directly converts concept art into 3D game assets, minimizing modeling time from hours to minutes.
3. 3D Modeling and Refining Software
The model initially created typically requires refining, texturing, and rigging in some cases.
- Blender: It's an open-source and free tool with so many features, including sculpting, UV mapping, and rendering.
- ZBrush: For sculpting organic models like characters, faces, and anatomical systems.
- Autodesk Maya: It's standard software in the film and animation industry, featuring comprehensive rigging and animation capabilities.
4. Cloud-Based and Entry-Level Solutions
Streamlined interfaces and automated pipelines for informal use or small-scale applications.
- Smoothie-3D: Web application for you to doodle and extrude pictures into 3D form.
- Cloudinary AI 3D Generator: Suitable for creating light 3D assets for web and AR usage.
With this software, you can easily create 3D models whenever you need them! Each tool has its own unique features, so take a little time to get to know the software.
Step-by-Step Guide: How to Create a 3D Model from a Picture
This guide outlines each essential step to help you move from static image to fully exportable 3D model.
Step 1: Capture High-Quality Photographs
Your results are only as good as your input images. The goal is to ensure consistency and clarity.
- Use a high-resolution camera or smartphone.
- If using photogrammetry, take 20–50 images around the object in a 360° sweep.
- Maintain consistent lighting and avoid harsh shadows or glare.
- Ensure overlap between images for better spatial understanding.
Pro Tip: Use a turntable for small objects to capture smooth rotational views.
Step 2: Choose the Right Software
Decide based on the image types and your final output goals.
- For multi-angle photos: Meshroom, Metashape, or RealityCapture.
- For single images: Luma AI, Smoothie-3D, or Cloudinary’s tools.
- For concept art to asset pipeline: Try Kaedim or similar AI solutions.
Step 3: Import and Process the Image(s)
Import images into software of your choice.
- Let the software combine the photos or process depth cues.
- A dense point cloud or mesh will result.
- Scale, surface detail, and lighting parameters can be adjusted if necessary.
This will take a few minutes to one hour depending on image size and software.
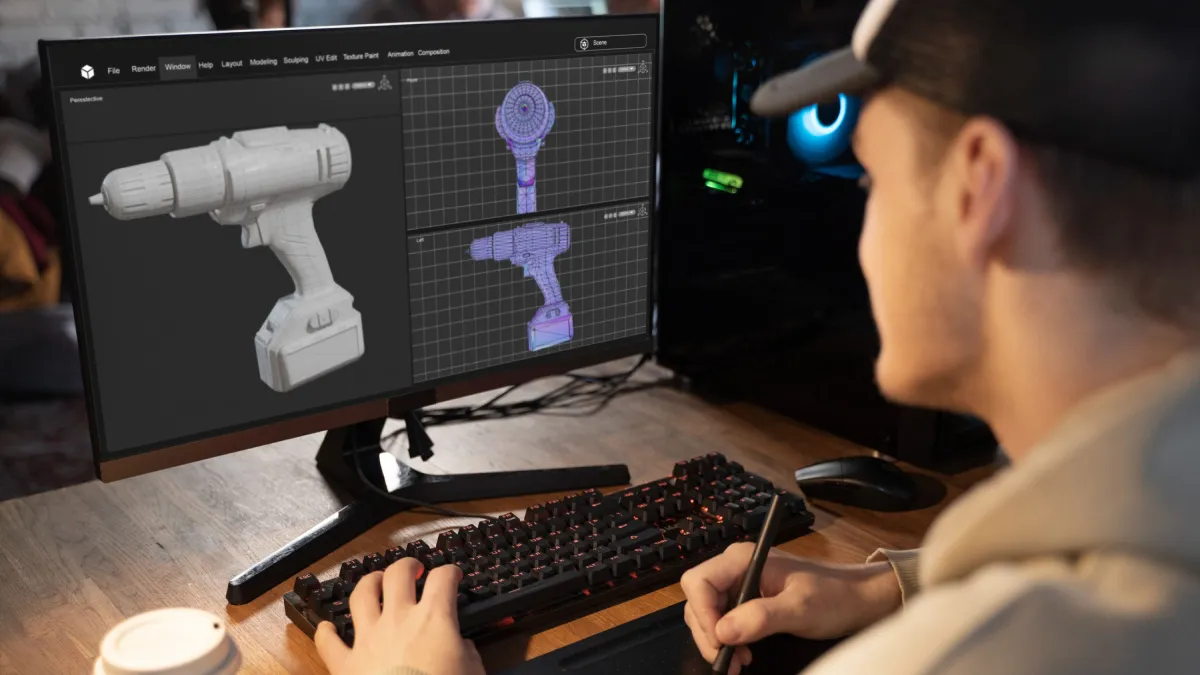
Step 4: Clean and Refine the Model
Even the best-created models require some polishing.
- Import the model to ZBrush or Blender for cleanup.
- Close up holes, geometry correction, and optimize topology.
- Employ UV maps and textures with projection painting or PBR materials.
- Optional: Rig the model for animation or physics properties.
Step 5: Export the Final Model
After refining, export your model in the right format.
- .STL – Best suited for 3D printing.
- .GLB/.GLTF – Best suited for AR/VR and web deployment.
- .OBJ – Overall modeling format supported by most engines.
You may now employ the model in game engines, 3D printing, marketing renders, or virtual experiences.
Common Challenges When Converting Pictures to 3D Models
While converting 2D pictures into 3D, you may face some issues. Here are given 3 issues with solutions.
1. Depth of Data Missing
Issue: Lack of depth in 2D images can mislead the 3D models.
Solution: Use depth estimation AI when you have only one image, or go with photogrammetry techniques (taking multiple images from different angles) to generate accurate 3D depth information.
2. Specular or Transparent Surfaces
Issue: Shiny or transparent objects mislead most photogrammetry and AI tools.
Solution: Apply matte coatings or use polarizing filters during photography to reduce reflections and improve capture accuracy
3. Poor Image Quality
Issue: Sometimes, images that are out of focus, noisy, or poorly lit result in low-quality or faulty models.
Solution: Use a tripod, adjust the lighting settings, and double-check the focus for each shot.
Benefits of Using 3D Models
Constructing 3D models with photographs is not only an artistic work but also a valuable business and technological benefit.
- Realism: Support more detailed real-world data than hand-modeling.
- Cost Efficiency: Escape the expense of professional CAD modeling.
- Speed: Makes prototypes or visualizations quickly.
- Enhanced Experience: Adjust VR, AR, and XR experiences with interactive media.
- Marketing Boost: Provide 360° product views to increase online engagement and conversions.
Industry Uses of 3D Models Based on Photographs
Let's discuss the application of the 3D tech process to address practical issues in various industries.
1. E-Commerce and Retail
- Turn product images into interactive 3D objects.
- With 3D technology, customers can now try on clothing virtually, allowing them to determine which dress best suits them best.
- Enhance buyer confidence and avoid product returns.
2. Furniture and Interior Design
- Use room and furniture images to design and represent virtual room designs.
- Facilitate easier collaboration through visualization prior to production.
- Integrate into AR for realist previewing of how those look in your house.
3. Healthcare and Medical Fields
- Generate anatomical 3D models from patient images for pre-surgical planning.
- Help design custom prosthetics and orthotics with precision.
- Use in medical training simulations so that no need extra physical resources.
4. Gaming and Digital Art
- Translate concept art into game-ready assets with minimal modeling effort.
- With use of NeRFs (Neural Radiance Fields) to recreate real-world scenes as immersive backdrops.
- Speed up the art pipeline for professional game developers.
5. Architecture and Construction
- Turn building photos or blueprints into realistic 3D walkthroughs.
- Enable virtual site visits for clients or remote stakeholders.
- Aid in urban planning and development visualization.
How to Choose the Right 3D Modeling Service for Your Needs
If you can't create your own models, then outsourcing a 3D modeling service provider may be the right solution for your business.
1. Define Your Project Scope
You must define exactly what you require before you go to any provider.
You need to ask yourself:
- Will it be a product model, character modeling, or architectural visualization?
- Do you require geometry only or also texturing, rigging, and animation?
- Is the model planned for 3D printing, a game engine, AR/VR, or rendering?
Know your own goals so that you can skip providers who offer other services and waste less time.
2. Verify Industry Specialization
Not all 3D modeling services are equal; some specialize in doing industrial design only, and some do great character modeling or environmental art.
Specializations:
- Product Rendering: For consumer products, packaging, and e-commerce.
- Architectural Visualization: Marketing real estate, interior/exterior walk-throughs.
- Medical Modeling: Anatomical and prosthetic modeling with accuracy.
- Game Assets: Low-poly models for Unity or Unreal engines.
- NFTs or Digital Collectibles: Stylized or cartoon-style character design.
Pro Tip: Search for portfolios or case studies in your industry. This indicates that the provider is familiar with your standards and use-case demands.
3. Check Portfolio
A service provider's portfolio is one of the best predictors of their skill.
What to search for in a portfolio:
- Variation in style and complexity.
- Realism, light quality, and texturing skills.
- Dimension and proportion accuracy.
- Clean topology and wireframe quality (if the models will be rigged or animated).
Red flags:
- More than the usual amount of template or template-like work.
- Project information or client names are missing.
- Single-angle-only perspectives may conceal flaws.
4. Keep in Mind Their Software Skills
Each project is unique, and it is important that the service provider is using industry-standard software that gets along with your pipeline.
Search for skills in:
- Blender / Maya / 3ds Max – General-purpose modeling and animation.
- ZBrush – Organic sculpting, ideal for characters or medical models.
- SolidWorks / AutoCAD / Rhino – Technical and industrial modeling.
- Substance Painter – For high-end texturing.
- Unreal Engine / Unity – Real-time rendering and game integration.
- Photogrammetry / NeRF / AI Tools – For converting real-world photos into 3D models.
If your model needs to be part of a larger development project (e.g., game, website, AR experience), confirm they can deliver compatible file formats like .GLB, .FBX, .OBJ, or .STL.
5. Discover Their Workflow and Communication System
Technical proficiency is as crucial as a smooth working relationship.
What you Ask:
- Onboarding procedure: Do they take detailed briefs, references, or sketches?
- Communication tools: Do they employ project management tools, email, or chat?
- Milestone deliveries: Are there checkpoints to sign off progress?
- Feedback cycles: How many revisions are encompassed within the fee?
An open, collaborative workflow minimizes miscommunication and improves project success rates.
6. Compare Pricing and Packages
Pricing can greatly depend on complexity, level of detail, turnaround time, and experience.
Pricing models to expect:
- Hourly: For undeveloped or flexible projects.
- Per model or per asset: For defined-scope projects.
- Tiered packages: May involve varying levels of detail, rendering, or animation.
Always query explicitly:
- What's covered (e.g., rendering, texturing, rigging)?
- What constitutes an additional revision?
- Licensing conditions for commercial purposes.
- Delivery timeline and rush charges (if applicable).
Avoid automatically opting for the cheapest option; low prices often reflect less experience or subpar work.
7. Ask About Revisions and Support
Even with the best planning, you might need changes during or after delivery. A good 3D modeling service offers reasonable revision policies and post-delivery support.
Check for:
- The number of free revisions included.
- Availability of updates (if you're testing the model in an app or print).
- Long-term support for future edits or iterations.
- Willingness to provide working files (if needed).
Pro Tip: For large-scale or recurring projects, consider establishing a retainer contract or a preferred vendor agreement.
8. Check Client Reviews and Reputation
Beyond their portfolio, reviews can give you insight into how the team communicates, meets deadlines, and handles problems.
Where to look:
- Freelance platforms like Fiverr, Upwork, and PeoplePerHour. (if needed freelancer)
- Google Reviews or LinkedIn testimonials.
- Review websites like Trustpilot, Clutch, industry forums, and Reddit threads.
Avoid providers with multiple complaints about missed deadlines, poor communication, or unprofessional behavior.
9. Test with a Small Project First
If you’re planning a long-term partnership or bulk order, consider starting with a small project or test asset.
Why test works essential:
- Evaluate their workflow and responsiveness.
- Review model quality, file accuracy, and render realism.
- Assess overall fit before committing to a large investment.
It’s better to learn early than regret later. You can also check out detailed information about choose the best 3D modeling services provider so that you can get a better insight.
Summary Checklist for Choosing a 3D Modeling Service
| Criteria | What to Check |
| Project Scope | Type of model, required formats, output goals |
| Portfolio | Relevant industry experience and quality |
| Tools & Software | Compatibility with your project |
| Workflow | Communication clarity and milestone planning |
| Revisions | Flexible feedback loops and post-delivery support |
| Cost | Transparent pricing and value for money |
| Reviews | Verified feedback from past clients |
| Test Projects | Trial runs before long-term commitment |
Frequently Asked Questions
What is 3D modeling?
3D modeling is the process of creating a digital representation of an object in 3 dimensions using software.
How can I create a 3D model from a picture?
You can use photogrammetry or AI-based tools to convert multiple 2D images into a detailed 3D model. Just upload, process, and refine.
What tools are best for creating a 3D model from a picture?
Popular tools include RealityCapture, Agisoft Metashape, Meshroom, Blender, and AI tools like Luma AI and Holosnap.
Can I create a 3D model from a picture on my own?
Yes! With user-friendly tools and a few good photos, even beginners can create basic 3D models on their own.
Is it expensive to create a 3D model from a picture?
It varies. Free tools exist, but higher-quality results may require paid software or professional services.
What industries benefit from creating 3D models from pictures?
E-commerce, gaming, architecture, healthcare, digital art, and interior design all benefit from this 3D technology.
Can AI create 3D models from pictures?
Absolutely. AI-powered tools like NeRFs and Holosnap can generate 3D models from 2D images with fantastic realism.
How much does it cost to create a 3D model from photos?
Photo-to-3D modeling costs between $200 and $1,500 per model. This is 60-75% cheaper than traditional modeling, which costs $2,000 to $5,000.
How much can 3D models increase my sales?
E-commerce sites that use 3D models have 27% higher conversion rates.
How fast can I get 3D models created?
AI tools can create models in just 2 to 3 days, while traditional methods take 4 to 6 weeks. That's 90 to 95% faster.
Will 3D models reduce my product returns?
Retailers that use 3D models see 40-60% fewer returns.
Can 3D models help my Google rankings?
Pages that include 3D models have visits that last 35% longer and bounce rates that are 25-40% lower.
Conclusion
It is no longer limited to digital art professionals or expensive studios with expensive hardware to produce 3D models from images. Now, anyone can convert a flat picture into a dynamic, interactive, and realistic 3D asset with the right tools and some experience.
Whether you’re prototyping a product, bringing a game character to life, showcasing furniture, or simply exploring a creative idea, the step-by-step process outlined in this guide equips you with everything you need to succeed. As technologies like AI evolve, we’re entering a future where a single photo might be all you need to bring your imagination into the 3D world.